
Is there anything more heartbreaking than watching a squirrel run off with one of your green cherry tomatoes, take a bite out of it, then throw it to the ground before going back to get another one?
That was the scene in our backyard last summer.
Needless to say, learning how to build a squirrel proof garden enclosure has been on my to-do list ever since.
We’d labored as a family to build a wonderful raised vegetable garden. We lovingly planted half a dozen tomato plants and carefully cared for a handful of cucumber, melon, squash and pepper plants, eagerly anticipating a summer filled with fresh, homegrown fruit and veggies on the dinner table.
Read More About Planting Fruits And Veggies With Your Kids
Fast forward a few weeks and our beautiful garden was thriving but nothing was growing ripe. Tomatoes were disappearing before they had a chance to turn red, squash blossoms were being picked apart and cucumbers were brutally shortened before reaching their peak. The culprits? Squirrels.
The furry little critters were pillaging our gorgeous garden, and what made it worse was that they weren’t even enjoying the fruits of our labor-they discarded them after just one sour bite. We were determined to put an end to this vicious cycle by constructing a squirrel-proof enclosure for our garden.
With an army of pine boards, a handful of landscape poles, a roll of rubberized hardware cloth and some bird netting, we constructed a critter proof 12-by-24-foot critter proof garden enclosure and gave our garden a chance at a new life.
This summer it produced in spades, gifting us with delicious ripe red tomatoes, bunches of bell peppers, sumptuous zucchini and crisp cucumbers. The squirrels looked on helplessly from behind the barrier, contenting themselves with the copious acorns from our many oak trees.
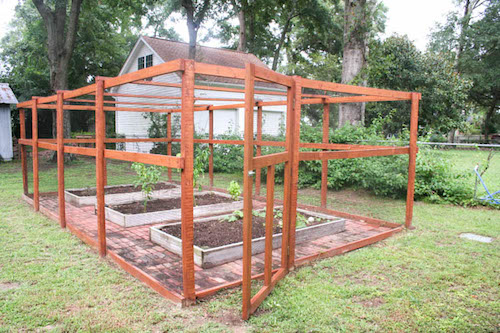
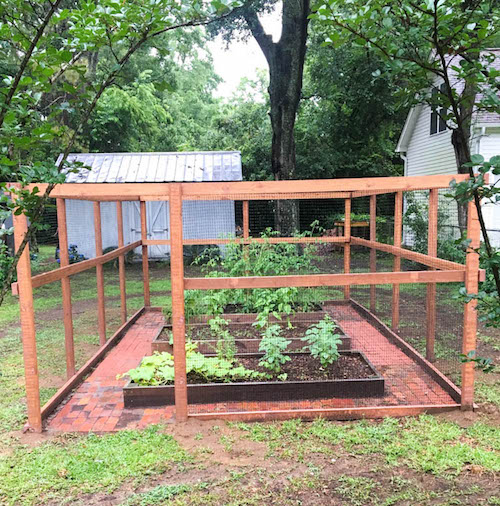
Our completed garden enclosure.
The beds are getting ready for our fall plantings, which is why they look a little bare, but they really produced for us this summer!
Here is the garden earlier in the summer, during construction. We still had to put the door on.
Here’s how we constructed our veggie garden savior.
Supplies
- 20 pine boards, 12’ x 2” x 4”
- 12 landscape poles, 8’ tall
- A box of 2.5” galvanized screws
- One pack of screw-in hooks
- A roll of rubberized/PVC hardware cloth
- Bird netting
- Quickcrete
- 1 gallon can of exterior wood stain
Tools
- Kreg jig
- Miter saw
- Power drill
- Level tool
- Staple gun
Step One: Measure
We measured the entire area we wanted to enclose, plus allowed for my 6-foot-4 husband to be able to stand up in the garden. This resulted in a 12 ft. wide by 24 ft. long and 8 ft. high structure. It was quite a bit bigger than we’d anticipated, but the best solution if we wanted to be able to get into the garden comfortably.
Step Two: Gather Your Materials
We had a very large space we needed to enclose, as we paved around the three raised beds we built. This meant we needed 20 posts for the “fence” of our enclosure and the roof supports and 12 landscape poles for the fence posts. If you have a smaller area to cover, you won’t need so much lumber. 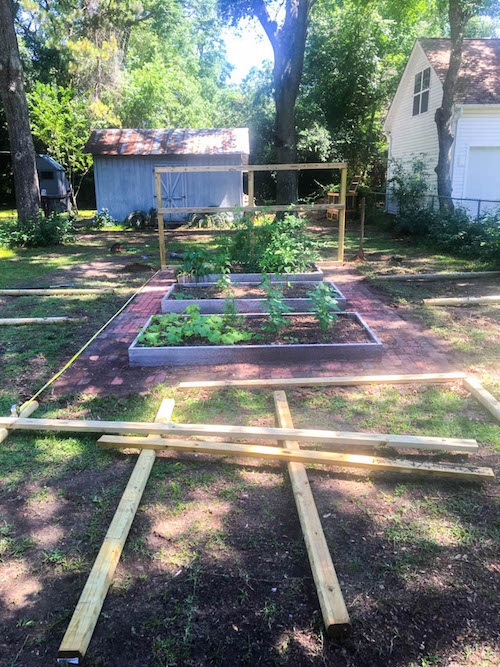
Step Three: Build Your Fence
We built each side of the fence individually. First, we buried the landscape posts at each end, then put the middle posts in. We buried them about a foot and a half down and poured a little bit of Quickcrete in each hole to keep the post steady.
Next, we took the 2×4 planks and placed them horizontally along the posts, one a little over halfway up and the other on the top. We used a level to make sure each side was straight, and affixed the planks by drilling in 2.5-inch galvanized screws. We built three sides of the fence this way, and then made the fourth side about four feet shorter to allow room for a door. We then placed three of the planks along the top of the structure to create our roof, going from landscape post to landscape post and securing them with screws. 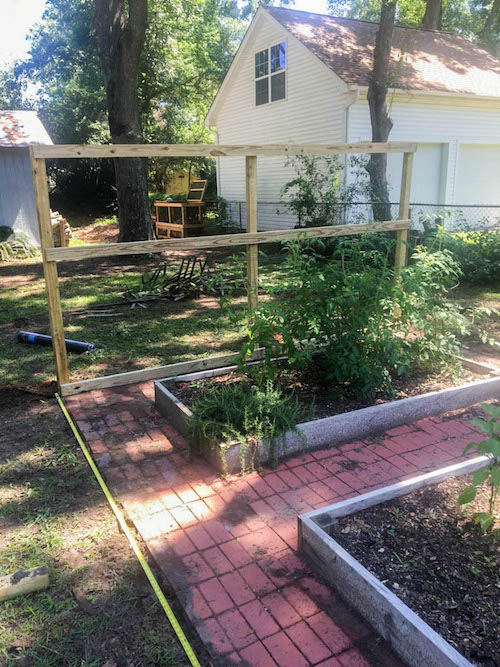
Step Four: Build Your Door
While the enclosure needs to keep the squirrels out, we needed a way to get in! So, using the same landscape poles for a frame, we built a door. We cut two of the 12 ft. planks into four equal pieces and two longer side pieces using a miter saw. We then constructed a rectangle frame with a cross support in the middle, connecting the pieces with pocket holes created with a Kreg jig. 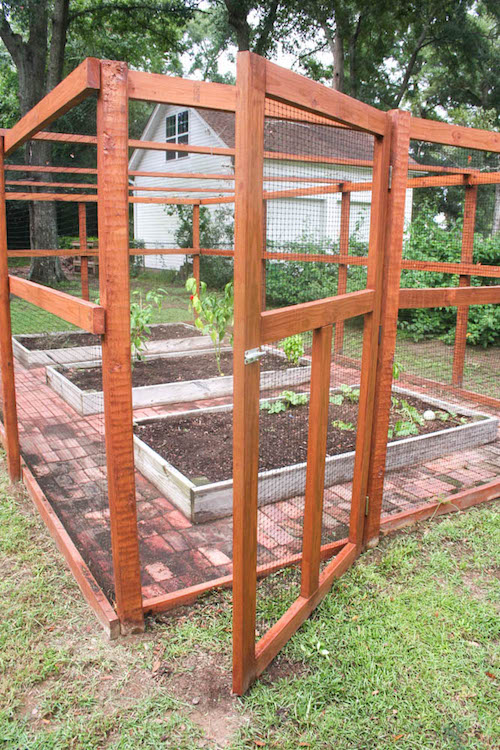
Step Five: Stain Your Frame
Once the frame and the door were built, we put a coat of exterior grade wood stain on the pine to protect the wood and help blend it in with its surroundings.
Step 6: Wrap Your Garden Enclosure
Now we just needed to “wrap” the sides to keep those critters out. We decided to use a rubberized hardware cloth that we wrapped around the entire structure (minus the top) and attached with a staple gun. If you need something tougher to keep out bigger animals, use steel hardware cloth-just be aware that it costs about double.
For the top, we chose a more delicate bird netting, which we can more easily remove should we want to. We affixed it with screw-in hooks dotted along the supports that go across the roof. 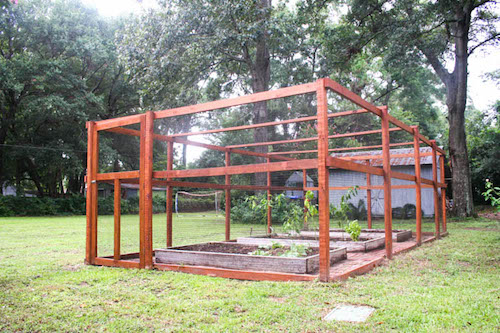
We are really thrilled with our finished squirrel-proof vegetable garden enclosure. It’s certainly been a labor of love, but we are looking forward to reaping the bounty of our efforts by enjoying fresh, homegrown fruits and veggies for many years to come.
If you are planning to plant a garden, researching the best ways for protecting gardens against squirrels before planting is a good idea. We learned this the hard way.
We would also advise preparing the beds and then waiting on planting until the squirrel proof garden fencing is up. You don't want to disturb the plants once they start growing.
Jennifer Tuohy is an award-winning freelance journalist with 15 years of experience in newspapers, magazines, marketing and online content. She lives in Charleston, SC, where she contributes to numerous websites, edits two local newspapers, raises two children and attempts to renovate her dream home. She also writes for Home Depot where they have a large selection of the tools, like miter saws, you would need to do a project like this one.
Read this next: Why We Need Bugs to Grow A Healthy Garden (+ How To Attract Them)


